Design, Education, Preliminary Design Stage Series

Preliminary Design Stage Series

[crowdsignal poll=0]

Welcome back to my blog guys!

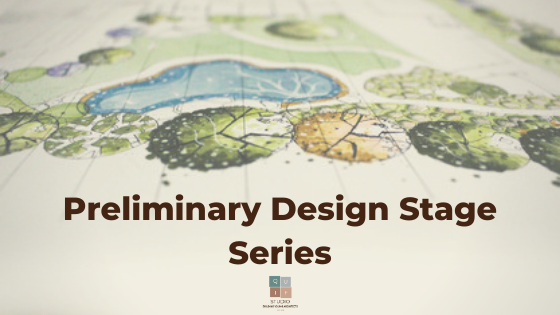
Welcome to the launch of a new series called the Preliminary Design Stage Series. I know from the title, you might be thinking “what is going on here?“. Well today, I am officially launching this series for the sole purpose of explaining what the entire preliminary design stage entails. Throughout the course of the series, I will be talking about each preliminary step taken before any architectural design.

From my previous post, which was talking about The Most Neglected Steps in Design, I pointed out that the most neglected steps are mainly from the preliminary stage which usually end up having an adverse effect on the overall design. This series is to help guide anyone in the architectural world (both in training and in practice) on what the steps are, their importance, and how to do them properly.

What is Preliminary Design Stage?

From the word preliminary, this is a stage in design that is done before the actual 2D or 3D architectural drawings. The stage involves gathering information of the site, its surroundings and the building type to be built or designed, and how that information is used in producing a functional design that will satisfy the users and fit perfectly into the environment. In a more detailed list below, these are the items that fall under the preliminary stage:

  1. Introduction
  2. Case studies and literature review
  3. Site selection criteria
  4. Site maps (site location map, vicinity map, etc)
  5. Site analysis
  6. Site zoning
  7. Space analysis
  8. Bubble diagrams
  9. Functional flow charts
  10. Schedule of accommodation
  11. Design concept

Depending on the project given, you might end up having a wider range of steps. For example, there might be cases where you are including sustainability or energy solutions to your design; sheets or presentations will be required on those issues which fall under the preliminary steps. In some cases, you are required to give an explanation of your building system, the materials and construction. This is also part of the steps. I only captured these 11 steps because they are the basic ones, but some of them are so wide and have a lot of categories under them as well.

Stay tuned for this series and comment down below what your expectations are. If you are a student, tell us what your favourite step is, what your least favourite step is, where you think you are lacking the most, etc. I would really appreciate your feedback. You can also email me with any suggestions from my Contact page. This series will also run through Instagram so make sure you check out our page from the links below.

Thank you for reading and stay safe!

Education, Tips and Tricks

The 3 Most Neglected Steps in Design

When anyone hears the word “architecture” or “architect”, only one word comes to mind. That word is design. The primary function of an architect is to design, and as we all know there are many stages that are taken in the design process before the final product is achieved (2D drawings, 3D drawings, models). In the preliminary stages of any architectural design, there are many things to consider like the site selection criteria, site location, orientation, concept development, zoning, bubble diagrams, space analysis and many more. There is also the specification stage where materials, finishing and construction methods are chosen. All these come together to form the lines drawn on paper (plans, elevations, sections) which will later on become a reality (building/structure). Neglecting any of these steps will have a drastic effect on any design or building. Today, I am going to highlight the 3 most neglected steps in design which are:

  • Site Analysis
  • Site Zoning
  • Specification writing and Detailing

Site Analysis

In the early stages of my training, I used to spend hours making sheets on site analysis and site zoning. I would make them as colorful as possible and draw many diagrams, but the truth was I did not know what half of those things meant. When I was presenting my drawings, I would just say “this is my site analysis showing the analysis of the site”. Thinking of it now makes me laugh honestly because that was just dumb, but towards my final year after doing much reading and going through courses like building climatology, I came to realize what those diagrams actually meant. I even challenged myself into choosing more complex sites as I reached my final year because I knew I could analyze them the right way and make designs that can fit right into the sites. So, how do you do a site analysis the right way? Below is a short guide on how to do a proper site analysis:

  1. Site analysis is done to analyze the existing features of any given site. It has 4 categories which are the geographical features, infrastructural features, climate features and vicinity features.
  2. All categories are to be described in detail. For example, geographical features include the sun path, trade wind directions, orientation, soil type, topography, vegetation, etc. you are to describe each of these in correspondence with your site of choice. These details might vary from different sites, therefore you and your friend using different sites may not have the same description.
  3. It is important to visit your site of choice to help you get more information about the site vicinity and existing infrastructure. For example, google map might show you the structures surrounding the site and those existing on it, but it surely will not give you any source of noise, footpaths, the main direction of wind, etc.
  4. As a student, you can create separate sheets dedicated to each category which will enhance the credibility of your work, while in practice you can explain the value of site visitation and its importance towards producing a better design for the client.
Source: Pinterest

Site Zoning

This is one the easiest yet most neglected steps in design. Zoning is all about knowing where to position certain spaces in a design based on some features that might affect the functionality of the space. These features are accessibility, noise, privacy, and security. Traditionally in training, we draw the shape of the site, include existing roads, and then zone them into 3 parts e.g. most accessible, semi accessible and less accessible, but there is much more to that when it comes to zoning. Zoning falls hand in hand with your bubble diagram. The application of these falls under of two types. There can be a site zoning or site bubble diagram and there is the zoning or bubble diagram for your building. Both are important but they are not the same. The zoning of your site will surely affect the zoning of the main building. For example, a nearby factory may affect your site zoning, which will may result in the positioning of some facilities (e.g. parking) in a certain way. Those facilities may not affect the zoning of your building as parking areas may generate unwanted noise. It is important to pay attention to these details as they can make or break your design.

Source: Pinterest

Specification writing and detailing

I had to reach my final year before I learnt how to make details on my own. Yes, I admit it. It was one of the things I hated doing the most as a student, and if not for a course I took a few months ago during my first year in my master’s program, I think I would have hated it for life. Besides, what is the point of making details? I have never seen a drawing submitted to a client with details and those details being used during construction. What made me realize how important detailing and specification is, was a statement my lecturer once made. He said “What do think made Zaha Hadid or Norman Foster or Frank Gehry the best? Was it because they opened their construction textbooks and copied their roofing details or wall details? Or was it because they studied the existing ones carefully and built on them?”. He explained that details are creations of our own 3D imagination. It tells us how we want a certain member to look like and how that look would be achieved. Sure there are members that are likely to be the same in every design, for example, foundation footing or roof trusses, but sometimes these members can be fabricated to fulfill a certain purpose like insulation, finishing etc.

Source: Pinterest

Specification writing and detailing go hand in hand as you need to specify the materials to be used and how they are going to be used. Lack of specification usually results in wrong choice of materials by someone who might not even have any knowledge of the matter. The wrong type of tiling in a bathroom can result to a person slipping which may lead to serious injury or even death. A simple tip for students on learning specification is to familiar with the materials around you. Know what type of flooring you are walking on, learn how it is made or fabricated, learn whether it is the best option for that specific location, and always ask questions.

It is particularly important to ensure you get all these things right because they highly affect the construction method, choice of materials and even the design as a whole. These are not only neglected by students, but it is quite common to see existing buildings around you that possess various problems not only as a structure but also affects the users of that building. Once the user is not satisfied, the building is considered to be poorly designed.

Thank you for reading, subscribe to my blog and stay tuned for more posts!

Education, Tips and Tricks

Tips on Time Management

“Time waits for no man”. That is a common saying that many of us know quite well. The very concept of time management is to help us plan to achieve certain goals whether short-term or long-term goals. Many students, professionals, or people in general have poor time management skills. Today, I will be giving you some few tips on how to manage your time effectively.

Leverage Deadlines

This tip is based on Parkinson’s law which states that work expands to fill the time available for its completion. This simply means that the more time you have, the more time used in completion of any work and vice versa. We usually have the tendency to underestimate our work, thinking that as a deadline approaches, we can finish on time which is sometimes not the case.

We can trick our minds and set deadlines for ourselves to complete our work even faster. The way this works is by setting incentives. For example, you can reward yourself with your favorite meal, movie, or activity upon completion of your task, or you can set a punishment for yourself when you fail to complete a task on time, like taking a lap around the house. This trick only works when you set your mind to it.

Pomodoro Technique

This is similar to sprints or workouts. It requires you to work as furiously as you can for twenty-five minutes and rewarding yourself with a five-minute break. This will help establish good habits for blocking out distractions and pushing ahead on difficult tasks. You can always turn your phone off or switch to airplane mode. You can use this technique to get ahead in different tasks. For example, spending time on task A for twenty-five minutes, take a break and spend another twenty-five minutes on task B.

Pareto Principle

The Pareto principle states that 80% of your results come from just 20% of your effort. That simply means that the tasks that make the most of your results at the end of the day, mainly come from the effort put into that specific task. Your tasks have a specific value or impact or priority. You can determine the scale of the priority of your work using the following steps:

  • Write out your to-do list. Below is an example of my to-do list for the day.
  • Add two columns next to your list and name them priority and effort.
  • Staring from the priorities, rank your tasks from 1-4, 1 being the most and 4 being the least. Rank them in an order you feel best.
  • Then do the same for the effort. Rank your tasks based on the effort it will take you to complete each task.

Now you have your tasks ranked based on their priorities and based on the effort you need to put in to complete them. I bet your asking; how do I make sense of all this? It is simple. You need to draw a box and divide it into four quadrants like in the diagram below.

Make a graph like diagram outside the box, including your negative and positive signs. On one axis write down priority and on the other, effort. Proceed to name your quadrants based on their locations on the graph.

The quadrants will include:

  1. High priority, low effort (1st rank)
  2. High priority, high effort (2nd rank)
  3. Low priority, low effort (3rd rank)
  4. Low priority, high effort (4th rank)

From your first table, you should be able to fit each task into a quadrant. For example, cleaning my room is my highest priority and it would take me the least effort to do. That means that it will fall under the high priority, low effort quadrant. “Completing chapter one” task is of the least priority but would take me some effort to complete, therefore it will fall under the low priority, high effort quadrant. Floor plans for client would take the most effort but its not of much priority, while writing a blog post is of some priority but it would not take much effort to complete. Ranking these two would be done based on effort as that is the essence of the pareto principle, therefore the former would fall under the high priority, high effort quadrant and the latter will fall under the low priority, low effort quadrant.

From this, you can now generate a new to-do list that shows you what tasks to do first. My new to-do list would be to clean my room first, draw the floor plans for my client, write my blog post, and finally complete my chapter one.

I personally like this principle as it helped me a lot when I was doing studio projects. You can have a list of sheets you would want to complete in a day, but you may end up not completing them because you placed much value on a sheet that isn’t as important as the rest and you may end up not reaching your goal for that day.

These tips are just a few tips out of an ocean of ideas, but these 3 are what I have tested out and found to be effective. I came across these tips on YouTube and you can watch the full video here. You can always search for more or develop your own techniques. Thank you for reading, be safe and stay tuned for more posts.

Education, Tips and Tricks

Dealing with expenses as a student

Training to become an architect is anything but cheap. From tools to supplies, the cost is usually a bit high. The most overwhelming part it is that your budget on a project has a huge effect on the outcome of your designs and models. Today, I’m going to talk about how you can have a nice outcome on your project without spending too much on it.

The Essentials

As an architecture student, there are the essential drawing tools and supplies. These range from the paper you draw on, the pencil you use, scale rule, set squares, T-square, color pencils, markers, masking tape, erasers, sharpener, etc.

For paper, the price ranges with the size, but the most common types of paper size used is A3, A2, and A1. The quality of the paper also matters. The quality is measured in grams. I was a huge fan of the 100 grams paper because I loved using colors and markers. The quality of the paper made the colors look more appealing, but its a bit expensive compared to 80 grams or 70 grams.

 Pencils are of two types to an architect. You can use the traditional wooden pencil or you can go for the mechanical pencil which is refilled. Both have their pros and cons which will be discussed in another blog post, but I would suggest the mechanical pencil as refills are very cheap.

 Having the right markers and colors can do wonders to the final look on your drawing. Good quality markers are expensive and some don’t even last long. Learning to balance between markers and colors makes them last longer and adds a great touch to your drawings.

The Advanced Tools

These are tools that are not used on a daily basis but are equally as important. These included templates, stencils, French curves, ink pens, tracing paper, compass, etc.

Templates and stencils are important tools that are used as guides in drawing certain shapes. They come in different scales and types. The most important templates would have to be the circle template and furniture template. You can have a single circle template, but for the furniture template, it depends on your most used scale of drawing. It comes in scale 1:50, 1:100 and 1:200. You don’t have to own them all because they are expensive, but advisably choose the best scale for your working drawings and presentation drawings.

French curves are tools that help you draw curved lines such as ellipses, parabolas and hyperbolas. They are of different sizes and shapes. The traditional French curve used usually comes in a set of 3. It is plastic, cheap and can easily break if not handled with care.

French Curves

Ink pens are pens used for tracing drawings. They come in different line widths ranging from 0.1mm to 2.0mm. They can be sold in pieces or in set of 3, 4 or 8. These pens are generally expensive but the price ranges from the brands. The best brand to buy will have Rotring as it is not as expensive as other brands. The pens are refilled with ink. The ink is of moderate price and lasts long.

Tracing paper is used for tracing drawings for final ink juries. Tracing paper is fragile, it can tear easily and mistakes can’t be erased. You need to be extra careful when tracing your drawings. The cost of tracing paper usually fluctuates but it is a bit costly especially when you are using it in bulk.

Tracing Paper

The Modelling Tools

Modelling tools are tools used for making models. Modelling is a unique part of architecture. It is a 3D version of any design, either exterior or interior, which gives more realistic details about the design like color, texture, proportion etc. In achieving these details for a more appealing model, there is an issue of cost. The more you spend on materials for your model, the better its appearance. I like to think that models can be made on a budget. Set a budget for yourself and work within it. Your model does not necessarily have to be realistic. You can opt for an abstract model, or a block model.

The essential tools for modelling include blades, cutters, scissors, steel ruler, glue etc. Blades or cutters are of different sizes. Ideally, you should have a small size and a larger one. The small size helps you with tiny cuts or sharp angles, while the big one will help you with cutting through thick materials. A steel ruler is required to guide you in making straight cuts. Glues are of different types, but its advisable to go with adhesive glue as it is more effective, even though it can be a bit messy. For materials, just work within your budget and be creative.

One important thing in dealing with your tools is maintenance. If you maintain your tools properly, you will only need to purchase them once and use them till graduation. I hope this will help you in making decisions when it comes to buying all your necessary equipment. I left out that prices because they range from different localities and I wouldn’t want to throw you off track.

Thank you for reading and stay tuned for more posts!

Education, Tips and Tricks

How to get over your fear of presentations

Presentations are inevitable as an architecture student. Be it from simple assignments to design juries, you cannot escape it. Unfortunately for some students, presentations are their worst fears. The whole idea of being in front of a crowd can be terrifying, but the harsh truth is that you need to overcome that fear and be comfortable in your own skin. Being able to communicate your ideas is essential as an architect. Imagine being offered a contract by Dangote but because you’re too scared, you end up missing what might have being the biggest contract in your life. Now I find that terrifying, but fear not my friends because I have some tips that might help you get over your fear.

The first thing you need to know is that you need to accept who you are as a person and use that to your advantage. Do you have a nice smile? Smile while talking. Are you considered charming? Charm your audience. Are you funny? Add a little humour. Just do anything that makes you comfortable in your own skin. Don’t go to far. Don’t try to impress. Just be you!

Study your audience! This cannot be over emphasized. Your lecturers can be of different personalities and you need to study them carefully. Knowing how they react to certain things gives you an upper hand in being prepared for any criticism.

Study your presentation well. You need to be fully prepared for any presentation. Go over your work to make sure there aren’t any obvious mistakes. You can make small note cards to write down all your important points. Practice before the time of the presentation with your friends and family, or you can practice in front of a mirror (it actually helps).

Your appearance matters! The right outfit will surely boost your confidence level. Don’t be afraid of getting all dressed up for a presentation. It assures your audience that you are confident and that they should probably pay attention to this fabulous person.

Control your facial expressions. If you’re like me and you have a problem accepting corrections without it showing on your face, then this tip is for you. Find a good friend that reminds you to smile after every few minutes to avoid coming off rude.

Don’t be afraid of criticism! Nothing in this world is perfect, therefore your work can’t be 100%. You need to work hard, give it your best shot, and pray for the best. Criticism is not the end of the world. It could just mean that you’re not on the same page with that person or you need to work a bit harder next time.

Finally, and this is just a piece of advice, you can use all these tips and that day of your presentation may just not be your day. Life is full of ups and downs. You could do everything right and may end up having a bad day. It could be from you, or someone from your panel may give you a hard time for no obvious reason. I know the feeling and it sucks, but there’s always a silver lining to things. It may not turn out to be so bad. I have a classmate who had an awful design jury but ended up getting an A. So don’t be too hard on yourself if things don’t go as planned. Its just how life is.

These are the few tips I built on over the years. I hope this helps you in your future presentations and if there’s any thing that helped you personally don’t hesitate to share it in the comment section below. Thank you for reading and stay tuned for more posts!

Education, Tips and Tricks

How to get the best out of the studio (studio culture)

The studio is a place where imaginations and ideas come to reality, it is a place where ideas are born, where creativity finds its place, it is the sanctuary of the architecture student. To get the most out of it, one must relate with his/her colleagues. The one thing you share in common, which is the most important thing is design. Although, one’s measure of creativity varies by far or less with the other, the main aim is to learn, to learn to share, to experience, to interact, to get comfortable and engage in each and every studio activity.

I remember when I was in school, at the studio there were so many different personalities. Everyone had different taste in almost everything, and design was not an exception. At the beginning, being in the studio was almost boring, but then we began to understand each other, bit by bit, we interacted, we understood our differences, we began to learn from each other, and eventually we became friends with each other. Everything else turned out to be fun. We helped each other, not with our designs only, but with ideas as some of us had better experience at so many things than the others but we learnt the most out of anything together.

The point here is don’t refuse to interact with your colleagues. Don’t isolate yourself from your colleagues, because you’ll miss out on so many things. Here are some tips to get the most out of your studio:

  1. Never fail to learn, engage, and interact.
  2. Learn to plan: make a studio timetable, know the hours to spend at the studio, know when to take a break and let off some steam, know when to continue and when to stop, but never quit.
  3. Learn to make good research, and case study of your design, talk about your ideas with our lecturers.
  4. Do not refuse to improvise, always.
  5. Always have in mind that the design isn’t just about the drawing, it’s important to always learn about the philosophy of the design first, then the process to develop your own idea from it, then the ability to put it down perfectly.
  6. Never refuse to heed to meaningful corrections.
  7. Whenever you think about an idea, put it down on paper.
  8. Take your design seriously, and always make time for it, it should be on your top priority list.
  9. Learn to make neat and presentable sketches, especially of new ideas, or imaginations.
  10. Always go for consultations and make the corrections.
  11. Learn to make a good presentation of your design.
  12. Take good care of your drawing tools/instruments, and do not misuse them.
  13. Lastly, have fun!

These are some few tips (from experience), to make the best out of your studio, and bring out the best in you. Be part of the studio, for it is your home too, it’ll help build and shape your initiative. As they always say, “failing to plan, is planning to fail”. I hope you find this helpful and learn from it.

Stay tuned for more posts like this from Quif Studio. Thanks.

Education, Tips and Tricks

What to expect studying Architecture in Nigeria

Personally, what led me to architecture was the mere thought that it was mainly a combination of mathematics, physics and art. I love mathematics, weird right? I love anything that deals with calculations and experiments. What’s funny is that I was interested in being a medical doctor, but I hated studying. I hated being in front of books for long hours, I would definitely doze off. So, I had to decide and by doing some research I came across architecture. It had the 3 things I loved; mathematics, physics and art (or so I thought).

Architecture is a course that is both a science and an art. Along the four-year journey, courses like history, sociology, psychology, law, geography, engineering, mathematics, and physics are what you would likely encounter. There might be other courses from other related fields such as quantity survey, estate management, urban and regional planning, environmental management, and project management. I know what you’re thinking right now. How are these courses related to architecture? How does one cope with learning all these in just four years? What about design? Well ladies and gentlemen, design is a single course on its own. When you think studying architecture is just about design, trust me you are wrong.

In the first year, you mainly deal with general courses like mathematics and physics which every science student usually takes. There are some basic architecture courses like fundamentals of design, graphic communication, introduction to architecture, sociology for architects, etc.

The second year digs a bit more into the field. Architectural design starts from the second year. Building construction, building material science, history of architecture, building physics (building structures), model making, psychology for architects, environmental management, urban and regional planning are mainly dealt with in this year.

The third year is a bit more practical. As one of my lecturers always likes to say, “Architects are made in level 3”. Design is on a larger and more complex scale. Courses are a bit more realistic and practical. Construction, building structures, building climatology, urban design, building services such as acoustics, ventilation, electrical and mechanical services, fire safety and others, are what to expect.

The fourth year is mainly preparing you for life after graduation, life in the field of practice. Building economics, contract and arbitration, and professional practice are the focus of your final year. Your final year project including a written essay and a design project will mainly be what you are focused on.

I know it might seem a bit overwhelming, and don’t even get me started on the long hours of manual drafting in the studio, model making, the enormous workload, assignments, and presentations. One thing you get to take away from all this apart from achieving your dreams of becoming an architect, is that you get to be part of a family. Your classmates become more than your friends, they become your family. A family made in the studio.

Architecture isn’t only about the career, it changes and shapes your way of thinking, your imagination. It makes you see things better, makes you more observant of your surroundings. It also boosts your initiative and sense of creativity. So, let it flow through you, for it is a lifestyle.